Deploy Datascience infrastructure on Azure using Terraform
In this article I will talk about my experience building my first infrastructure deployment using Terraform that does (a little) more than combining off-the-shelf resources.
The stack we will deploy 📦
Lately I’ve been looking at a lot of Microsoft Azure services in the big data area. I am looking for something to replace a Hadoop based 🐘 data analytics environment consisting mainly of HDFS, Spark & Jupyter.
![]()
The most obvious solution is to use a HDInsight cluster which is basically a managed Hadoop that you can pick in different flavours. However with the elasticity of the cloud at my hands I wanted to go for a more diverse setup that also allows a pure #python 🐍 based data science stack without the need to use Spark. One reason for this is that many use cases do not require a calculation on all of the data but just use spark to mask the data. For the actual analysis/training the amount of data often fits in RAM — if I get a bit more than my MacBook Pro has to offer 🙄. The solution described in this article consists of a Data Science Virtual Machine 🖥 and Azure Files 📄 for common data store. As the file storage account has a cap on 5TB you might need something different if you really have a lot of data — or use multiple fileshares.
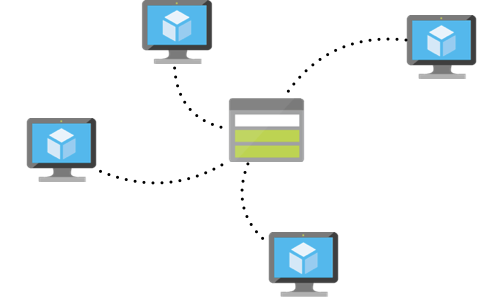
Target setup with multiple data scientist VM accessing a common data pool
Quick intro to Terraform 👀
Terraform is a tool for building, changing, and versioning infrastructure safely and efficiently. […] Terraform generates an execution plan describing what it will do to reach the desired state, and then executes it to build the described infrastructure. As the configuration changes, Terraform is able to determine what changed and create incremental execution plans which can be applied.
Infrastructure as Code (IaC) is an important aspect for me when managing a cloud solution. I want to be able to automate ⚙️ everything from infrastructure provisioning to code deployment. Amazon Web Services has Cloudformation, Azure has the Azure Resource Manager (ARM) templates but Hashicorps Terraform provides a somewhat cloud agnostic layer on top of those proprietary tools. ‘Somewhat’ because the recipes you write are specific to a certain cloud environment but it allows you to use common syntax to deploy a multi-cloud solution. The main reason for me to use Terraform instead of ARM is that it offers a better way to create modular recipes and not worry about handling the state during incremental deployments.
Building the Terraform recipe 📜
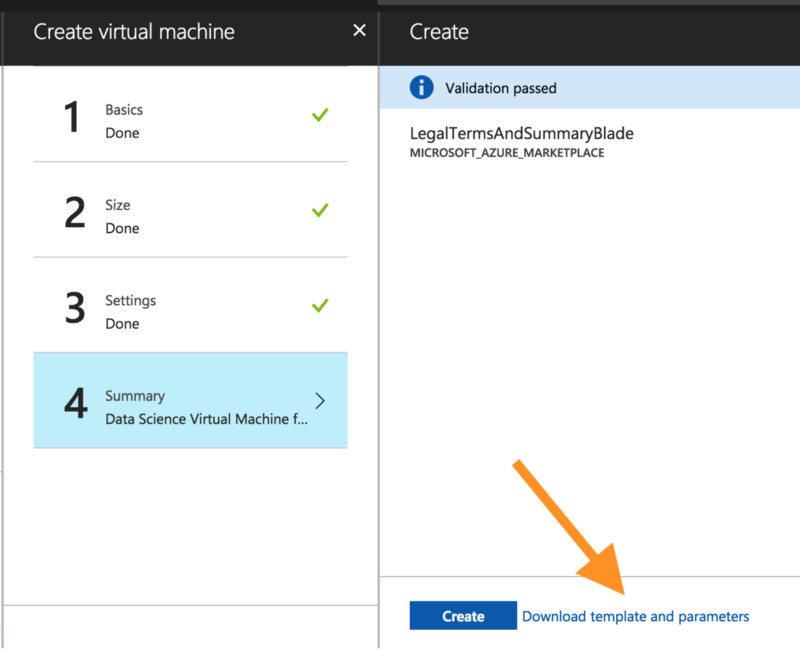
When deploying any higher level components the first thing to do is figure out what underlying infrastructure is used. The easiest way to do this is click yourself through the Portal to create the resource — in this case the Data Scientist VM — and look at the ARM template that drops out of this process. You could use it to deploy this VM automatically using either the ARM tooling or the azurerm_template_deployment in Terraform. However the ARM templates are way too complex to maintain to my liking.
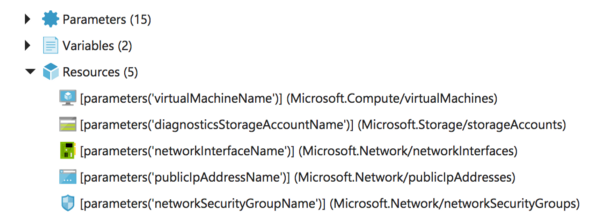
Resource view of the ARM template in Azure Portal
In the case of the Data Scientist VM you can see that five different resources are deployed to bring up an Azure VM. The machine itself which consists of compute and memory allocations. A storage account that holds the disk images and a couple of networking components.
If you look at the Virtual Machine recipe that is available on the Terraform docs you may see similar components. There they are called azurerm_virtual_network, azurerm_subnet, azurerm_network_interface, azurerm_virtual_machine. I took the Terraform example as a base for my recipe and tried to modify this vanilla Ubuntu VM into the Data Science VM that I clicked together using the Portal. So I was mostly interested in figuring out what part of the VM deployment makes the VM a Data Science VM with all those fancy software packages pre-installed.
  "resources": [
  {
      "name": "[parameters('virtualMachineName')]",
      "type": "Microsoft.Compute/virtualMachines",
      "apiVersion": "2016-04-30-preview",
      "location": "[parameters('location')]",
      "dependsOn": [
          "[concat('Microsoft.Network/networkInterfaces/', parameters('networkInterfaceName'))]",
          "[concat('Microsoft.Storage/storageAccounts/', parameters('diagnosticsStorageAccountName'))]"
      ],
      "properties": {
          "osProfile": {
              "computerName": "[parameters('virtualMachineName')]",
              "adminUsername": "[parameters('adminUsername')]",
              "adminPassword": "[parameters('adminPassword')]"
          },
          "hardwareProfile": {
              "vmSize": "[parameters('virtualMachineSize')]"
          },
          "storageProfile": {
              "imageReference": {
                  "publisher": "microsoft-ads",
                  "offer": "linux-data-science-vm-ubuntu",
                  "sku": "linuxdsvmubuntu",
                  "version": "latest"
              },
              "osDisk": {
                  "createOption": "fromImage",
                  "managedDisk": {
                      "storageAccountType": "Premium_LRS"
                  }
              },
              "dataDisks": [
                  {
                      "createOption": "fromImage",
                      "lun": 0,
                      "managedDisk": {
                          "storageAccountType": "Premium_LRS"
                      }
                  }
              ]
          }
      },
      "plan": {
          "name": "linuxdsvmubuntu",
          "publisher": "microsoft-ads",
          "product": "linux-data-science-vm-ubuntu"
      }
  }
The part of the ARM template that specifies the OS setup
The important fields to look at are the way the imagReference, osDisk and dataDisks are created and the plan that is required if you want to deploy a marketplace VM. These differ from the vanilla setup that we get from the Terraform documentation. By going through the Terraform docs on the VM provider you can identify the fields necessary to turn the example VM into a Data Science VM. The main changes are to create a storage_data_disk that has the create_option = fromImageThis seems to be required as the DSVM ships with some data according to the ARM template. The second thing to add is the plan property into your VM recipe. This should be set with the same parameters as shown above in the ARM snippet.
You can find my final resulting code on github 👯
That‘s it for the Data Scientist VM, now on to the File share 📄
Once you understand that the File service on Azure is part of the Storage suite you can either follow along the example above and look at the ARM template that the Portal generates or hop right into the Terraform documentation and look for possible ways to deploy storage resources.
Note: Before writing this article I didn’t realize there is an option to create a Fileshare using Terraform. So I initially built a custom Azure CLI script and hooked that into the storage recipe. Take a look at the code history if you want to learn more about fusing Terraform with the Azure CLI.
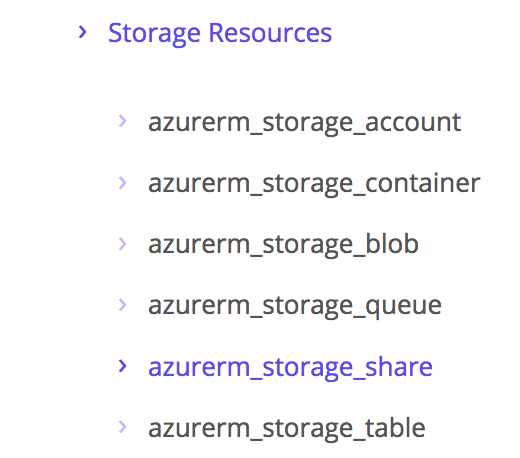
Storage resources in the Azure Provider for Terraform
Creating a recipe for the Fileshare is literally just copying the example as it does not have any customised properties. Make sure you give the whole setup pretty names and the correct quote and you’re done.
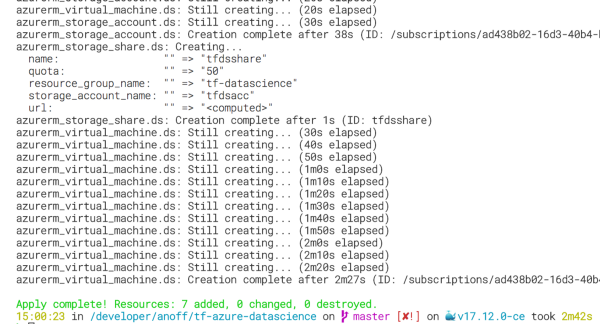
Run terraform apply -auto-approve to execute the recipe. In my latest run it took 2min 42sto spin up all the required resources.
Killing the components took twice as long 🙄
The full recipe will provision the following 6 resources for you. You might notice that Terraform mentions 7 added resources, the difference of 1 comes from the resource group that is not listed below. If you want to clean up just run terraform destroy.
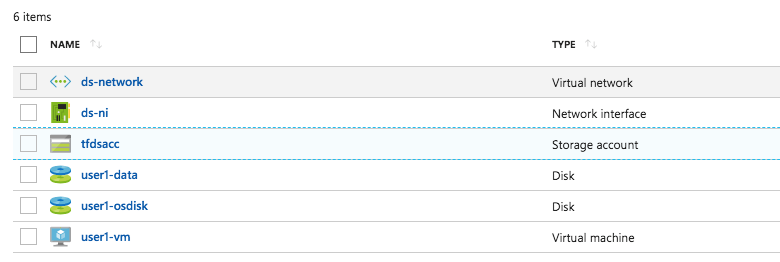
Fully provisioned Datascience Setup
Next steps 👟
There’s a bunch of things I want to improve on this setup:
Create a Terraform module for the Virtual Machine setup to easily create multiple VMs without cloning the 50+ lines recipe. The goal would be that the name of the VM, the size and the network can be defined. Ideally multiple data scientists would work in a common network.
Auto-mount the file share into the VMs during creation. The remote-exec provisioner might be a good way to start.
Feel free to discuss this approach or even implement improvements for this via a PR on github.com/anoff/tf-azure-datascience or on twitter 🐦. Hope you enjoyed my first article 🕺.