
Configure Azure Active Directory as Authentication Provider for Gitea
Gitea is an open source git hosting platform, written in Go forked from the Gogs project and seems to be highly inspired by GitHub. If you want to host your own git platform and want to use Azure Active Directory as an authentication provider - this post might help you.
Used abbreviations:
- AP: Authentication Provider
- AD: Active Directory
- AAD: Azure Active Directory
Authentication Providers
Instead of managing credentials in your application you can use external authentication providers (AP) to deal with user authentication. The most common scenario nowadays is the OAUTH protocol. Using an AP not only makes your life as a service developer/admin easier but also the user because he can reuse his identity from other services.
Gitea authentication sources (v.9f33aa6)
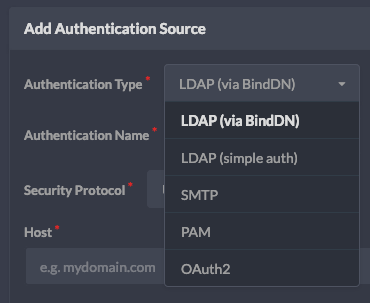
Gitea OAUTH providers (v.9f33aa6)
Gitea supports several authentication types and when it comes to OAUTH also several providers. The one we will use for including Azure Active Directory is the OpenID Connect provider that actually exposes a common standard for authentication providers to use, so applications like Gitea do not have to implement individual OAUTH providers.
We will be using the OAuth 2.0 auth code grant.
Creating an Azure AD application
📌 NOTE
This guide uses the App registrations Preview, if you use the classic app registrations you can just create a native application.
The first step is to create an application on Azure, head over to AAD - App Registrations in the portal and register a new application:
- name: irrelevant for the setup, will be presented to the user when asking for his permissions
- type: web
- redirect URI:
<host>/user/oauth2/<Authentication Name>/callbackas a callback URL where<Authentication Name>is a value you will specify in the next chapter e.g. AAD, Azure Auth
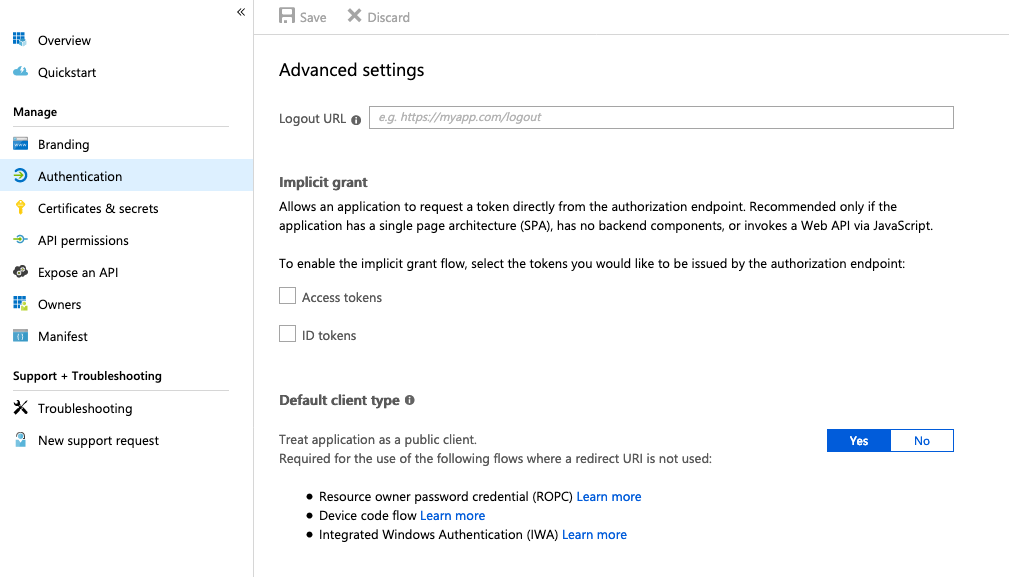
For Azure to implement the correct authorization flow (code) we need to change our application type to native, this can be done via the Manage -> Authentication blade in the Azure Portal. Set The default application type to Yes. In case the UI changes make sure to look out for Device code flow and make sure it is configured to use this method.
Change registered app from web to native type (App registrations Preview)
Scroll up on the same page and make sure you have a Redirect URI of type Web set correctly.
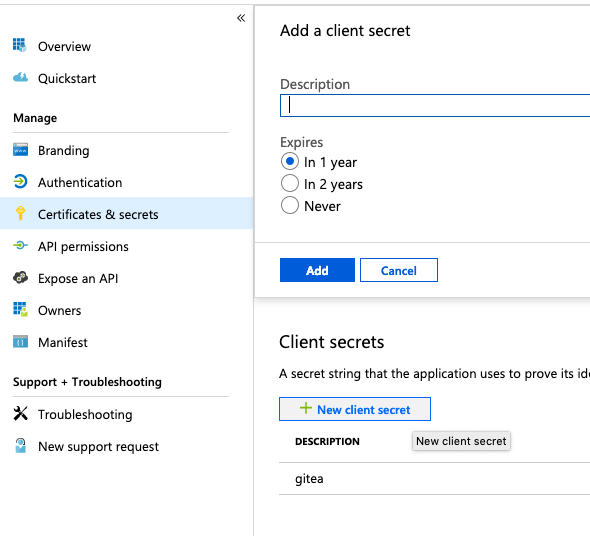
Finally we need to create a Client secret by going to the Manage -> Certificates & secrets panel and add a new client secret.
🔥 CAUTION
Make sure to copy the secret as it is created - you will not be able to access it later.
Create client secret (App registrations Preview)
For the configuration in Gitea you need the following values from your Azure App registration:
- Client Secret
- Client ID: go to the application Overview and copy the Application (client) ID string
- OpenID URL:
https://login.microsoftonline.com/<tenant>/v2.0/.well-known/openid-configurationwhere you can find your tenant also in the Overview tab as Directory (tenant) ID
Add Authentication Source in Gitea
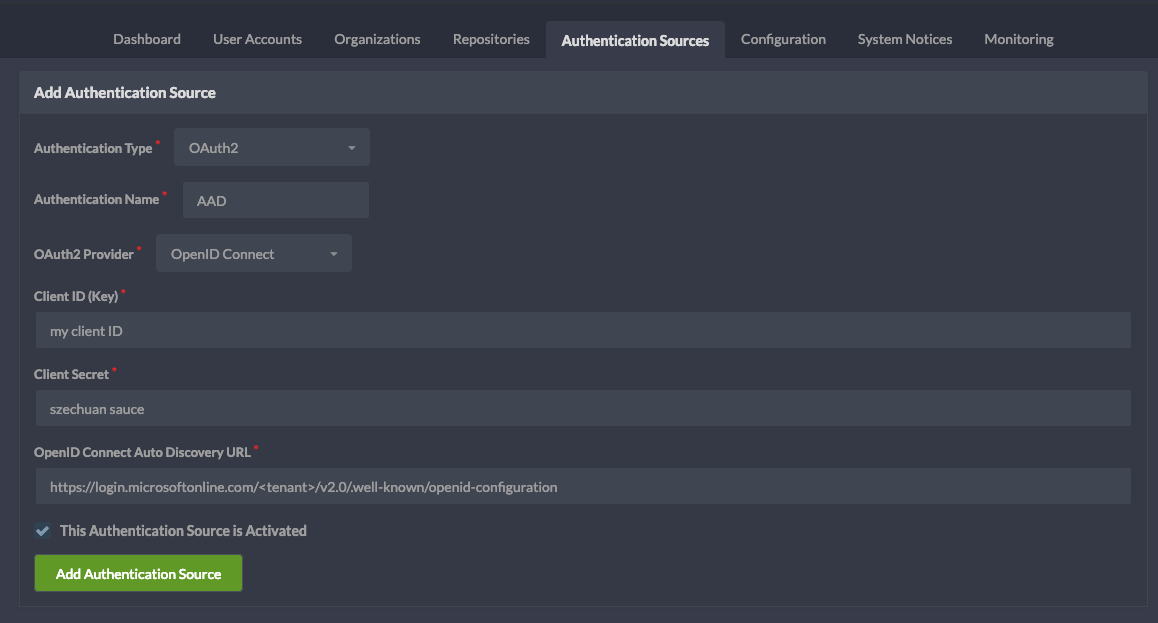
On the Gitea administration page select Authentication Sources and create a new one:
- Authentication Type: OAuth2
- Authentication Name: the same name you used for defining the callback URL in the previous step (e.g. AAD, Azure AD)
- OAuth2 Provider: OpenID Connect
- Client ID*, Client Secret* and OpenID Connect URL as previously specified
Configured Gitea Azure AD Authentication Source (v.9f33aa6)
If you are having issues following this guide or find information being outdated feel free to leave a comment or reach out via Twitter 👋