Collect IoT data from Arduino in InfluxDB
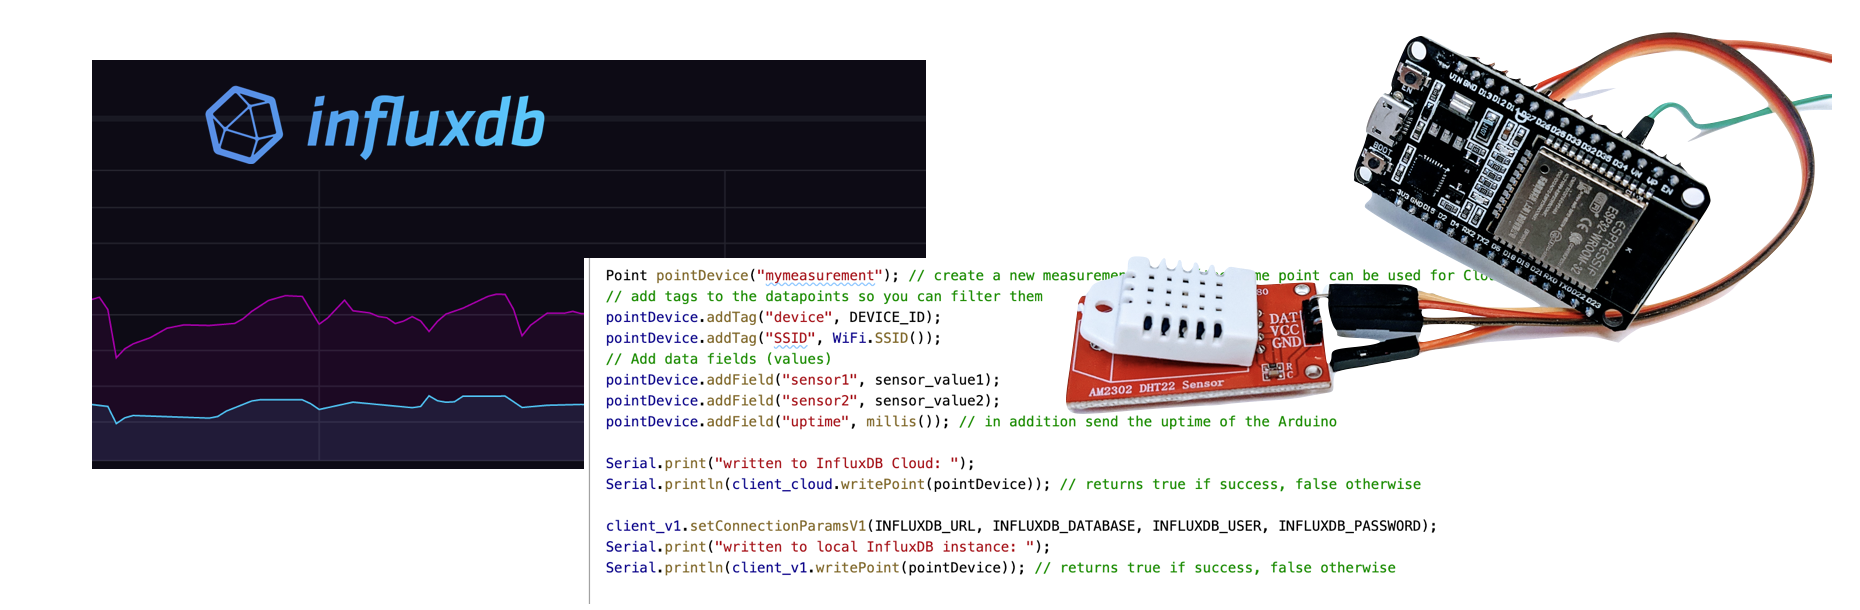
Did you add some fancy sensors to your Arduino board? If you have internet connectivity via ESP8266 or similar chips you can easily collect and visualize your sensor readings using InfluxDB. This blog post will cover how to send data from Arduino to InfluxDB Cloud (v2) but also to your self-hosted InfluxDB instance (v1).
Preparing InfluxDB
You can either create an account with InfluxDB Cloud offering or host your own InfluxDB instance. The free tier of the cloud service should be enough for basic home appliances with a few sensors and 1-2 readings per minute.
The biggest limitations of the free tier is that all data has a maximum retention of 30 days. That means if you are interested in aggregating data over several months the free tier will not work for you. You could either pay for their cloud service or run InfluxDB on a Raspberry Pi or any other home server.
InfluxDB Cloud
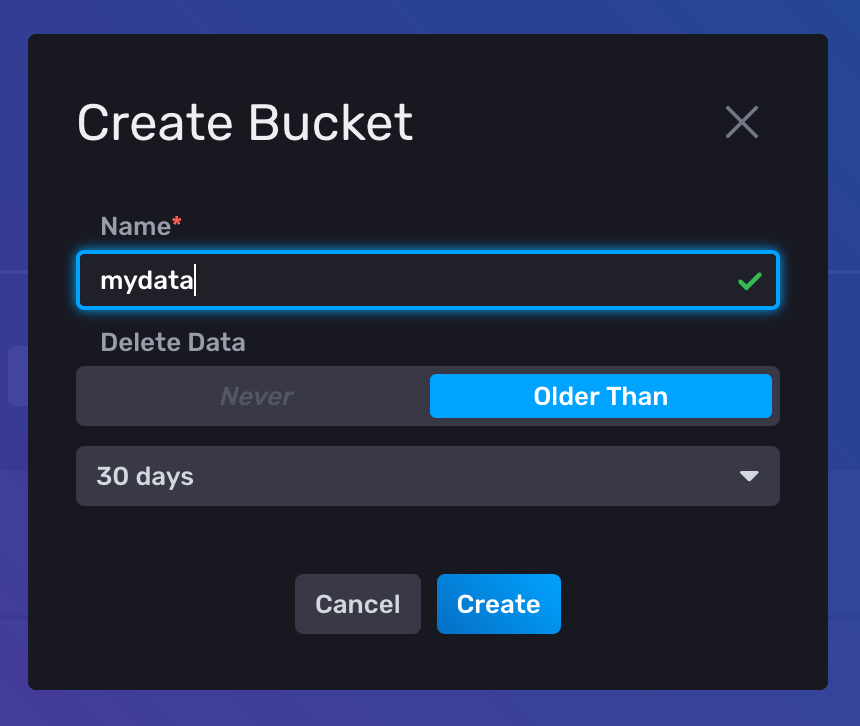
To get an InfluxDB Cloud account you do not need a credit card, just sign up and you are set. Basic setup would be to create a new Bucket for your data
Now you only need to create an access token for this bucket and write it down to use in your Arduino code.
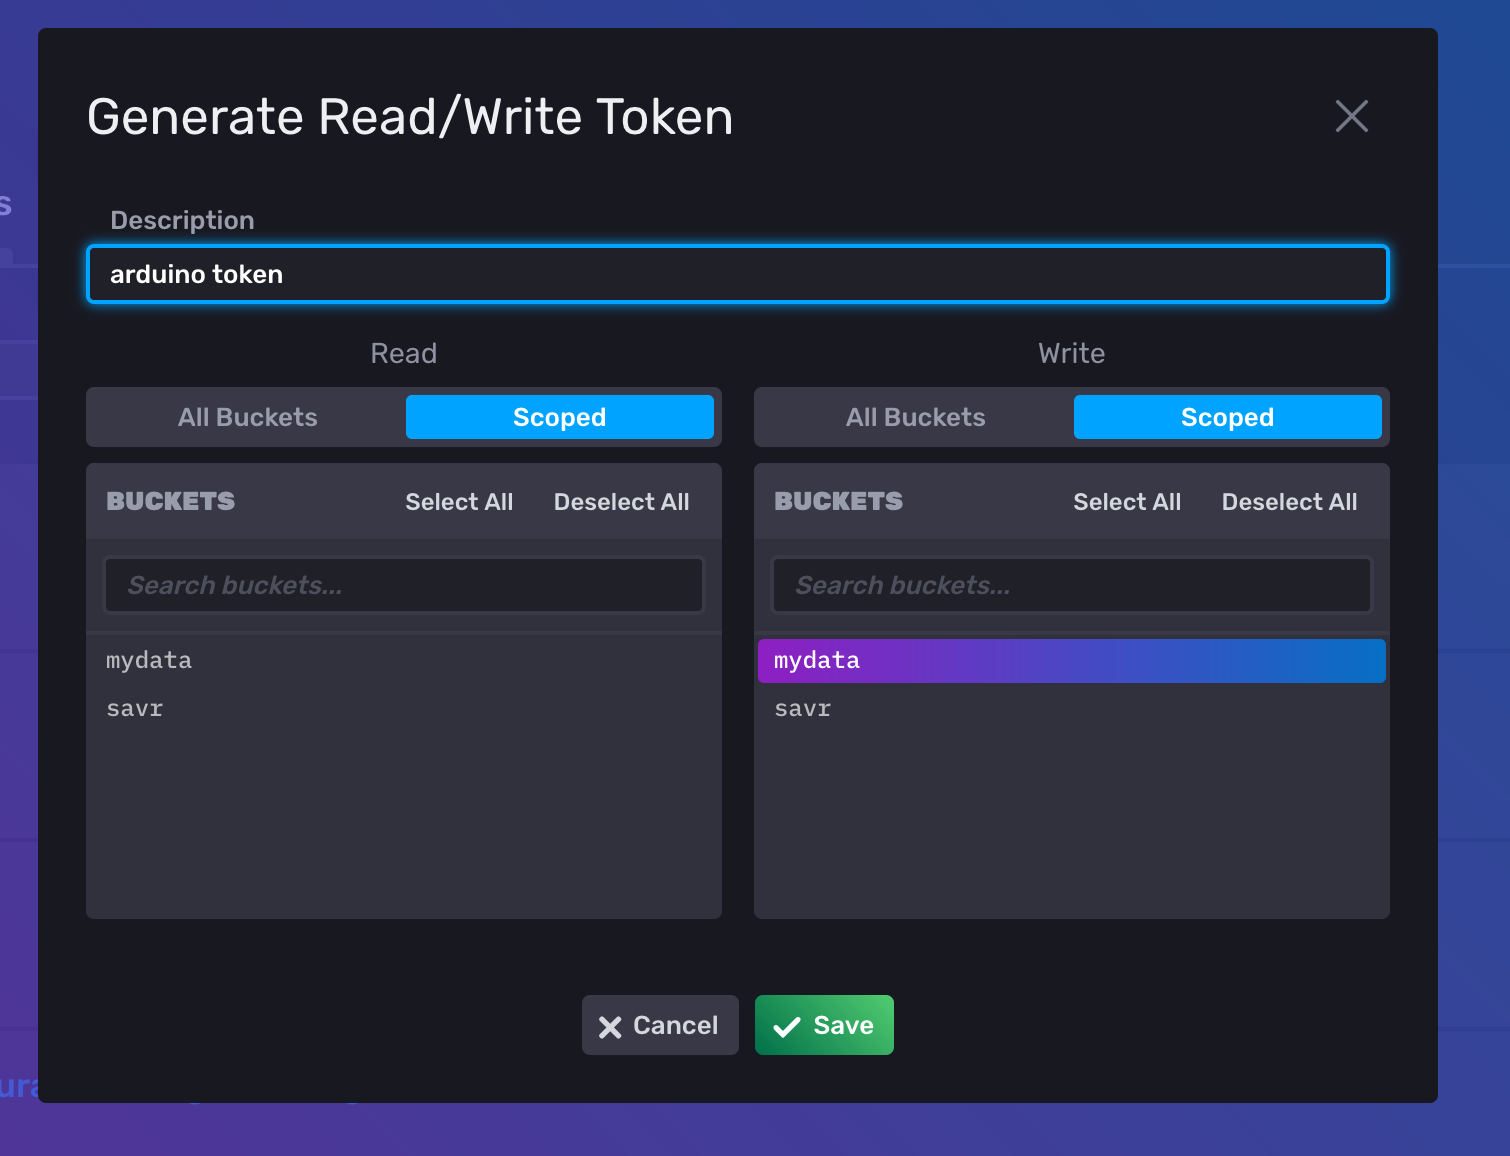
After creating a new token just click its name and you should see the details including the token value:

Self-hosted InfluxDB Instance
These instructions are for InfluxDB v1 (tested on v1.8)
Assuming you have your InfluxDB already set up connect to it via the InfluxDB shell and create a new database and user for your data.
You can connect to your database using influx -host <hostname> -p <port>
auth
# enter username and password of InfluxDB admin
CREATE DATABASE mydata WITH DURATION 31d # adapt retention policy to keep data for longer time
CREATE USER arduino WITH PASSWORD 'supersecret'
GRANT WRITE ON mydata to arduino
Arduino Code
The code shown here sends data a InfluxDB Cloud bucket as well as a self-hosted database. Depending on your choice you only need to reuse parts of the code shown here. In both cases we will use InfluxDB Arduino Client library.
This code uses the Arduino Deepsleep pattern on an ESP8266, the ESP.deepSleep() call sends the microcontroller into deep sleep where it consumes less power.
In addition to the code you need a secrets.h file that contains your WiFi credentials and access to the InfluxDB instance as #defines.
// content of secrets.h
#define WIFI_SSID "" // local WiFi name
#define WIFI_KEY "" // local WiFi password

// InfluxDB v2 server url, e.g. https://eu-central-1-1.aws.cloud2.influxdata.com (Use: InfluxDB UI -> Load Data -> Client Libraries)
#define INFLUXDB_CLOUD_URL ""
// InfluxDB v2 server or cloud API authentication token (Use: InfluxDB UI -> Data -> Tokens -> <select token>)
#define INFLUXDB_CLOUD_TOKEN ""
// InfluxDB v2 organization id (Use: InfluxDB UI -> User -> About -> Common Ids )
#define INFLUXDB_CLOUD_ORG "123"
// InfluxDB v2 bucket name (Use: InfluxDB UI ->  Data -> Buckets)
#define INFLUXDB_CLOUD_BUCKET "mydata"

// local setup
#define INFLUXDB_URL "http://someip:8086"
#define INFLUXDB_DATABASE "mydata"
#define INFLUXDB_USER "arduino"
#define INFLUXDB_PASSWORD "supersecret"
The actual code in your influx.ino file should look like this.
See comments within the code for how to use the InfluxDB client library in such a scenario.
#if defined(ESP32)
  #include <WiFiMulti.h>
  WiFiMulti wifiMulti;
  #define DEVICE "ESP32"
#elif defined(ESP8266)
  #include <ESP8266WiFiMulti.h>
  ESP8266WiFiMulti wifiMulti;
  #define DEVICE "ESP8266"
#endif
#include <InfluxDbClient.h> // load the client library
#include <InfluxDbCloud.h> // only for InfluxDB Cloud: load SSL certificate and additional method call
#include "secrets.h" // load connection credentials

#define SLEEP_S 30 // how many seconds to sleep between readings
#define DEVICE_ID "myroom"

// InfluxDB client for InfluxDB Cloud API
InfluxDBClient client_cloud(INFLUXDB_CLOUD_URL, INFLUXDB_CLOUD_ORG, INFLUXDB_CLOUD_BUCKET, INFLUXDB_CLOUD_TOKEN, InfluxDbCloud2CACert);
// InfluxDB client instance for self-hosted v1 database
InfluxDBClient client_v1;

// because we use the deepsleep pattern we put all our logic in the setup() routine and then send the microcontroller back to sleep
//  if your microcontroller is always up you might want to put the commands in your loop() routine instead
void setup() {
  Serial.begin(115200);
  Serial.println("Starting setup");
  delay(100);
  wifiConnect(WIFI_SSID, WIFI_KEY);
  // BEGIN: read sensor values (add your real code here)
  float sensor_value1 = 1.23;
  float sensor_value2 = 0;
  // END: read sensor values

  Point pointDevice("mymeasurement"); // create a new measurement point (the same point can be used for Cloud and v1 InfluxDB)
  // add tags to the datapoints so you can filter them
  pointDevice.addTag("device", DEVICE_ID);
  pointDevice.addTag("SSID", WiFi.SSID());
  // Add data fields (values)
  pointDevice.addField("sensor1", sensor_value1);
  pointDevice.addField("sensor2", sensor_value2);
  pointDevice.addField("uptime", millis()); // in addition send the uptime of the Arduino

  Serial.print("written to InfluxDB Cloud: ");
  Serial.println(client_cloud.writePoint(pointDevice)); // returns true if success, false otherwise

  client_v1.setConnectionParamsV1(INFLUXDB_URL, INFLUXDB_DATABASE, INFLUXDB_USER, INFLUXDB_PASSWORD);
  Serial.print("written to local InfluxDB instance: ");
  Serial.println(client_v1.writePoint(pointDevice)); // returns true if success, false otherwise

  // this sends the microcontroller to deepsleep until the next reading needs to be taken
  //  due to WiFi connect and sensor reading your measurement interval will always be 5~10 seconds longer than the SLEEP_S duration
  ESP.deepSleep(SLEEP_S * 1000000 - millis()*1000); // offset by the duration the program run (converted from ms to µs)
}

void loop() {
}

// try to connect to given SSID and key, loop until successful
void wifiConnect(const char* ssid, const char* key) {
  WiFi.begin(ssid, key);
  Serial.print("Waiting for WiFi connection..");
  while (WiFi.status() != WL_CONNECTED) {
    Serial.print(".");
    delay(500);
  }
  Serial.println(".");
  Serial.print("Successfully connected to ");
  Serial.println(WiFi.SSID());
}
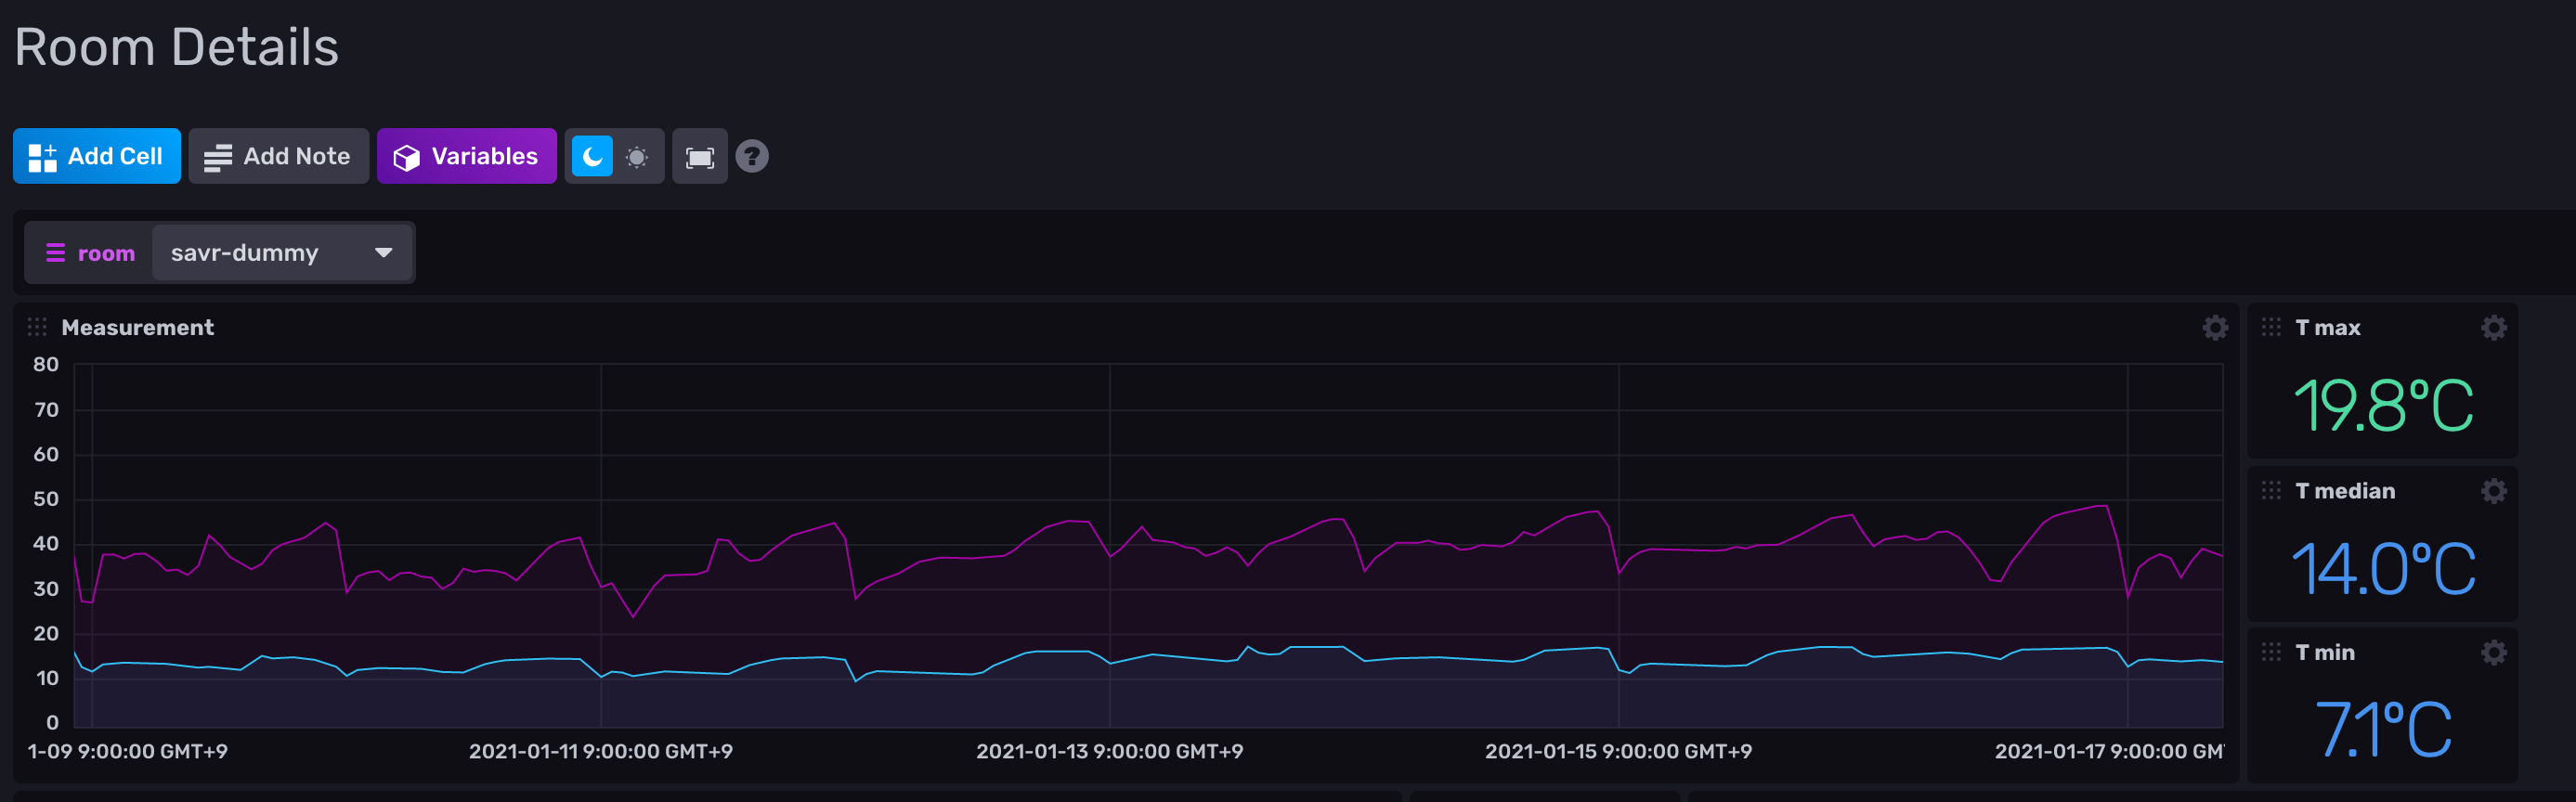
Check out your data
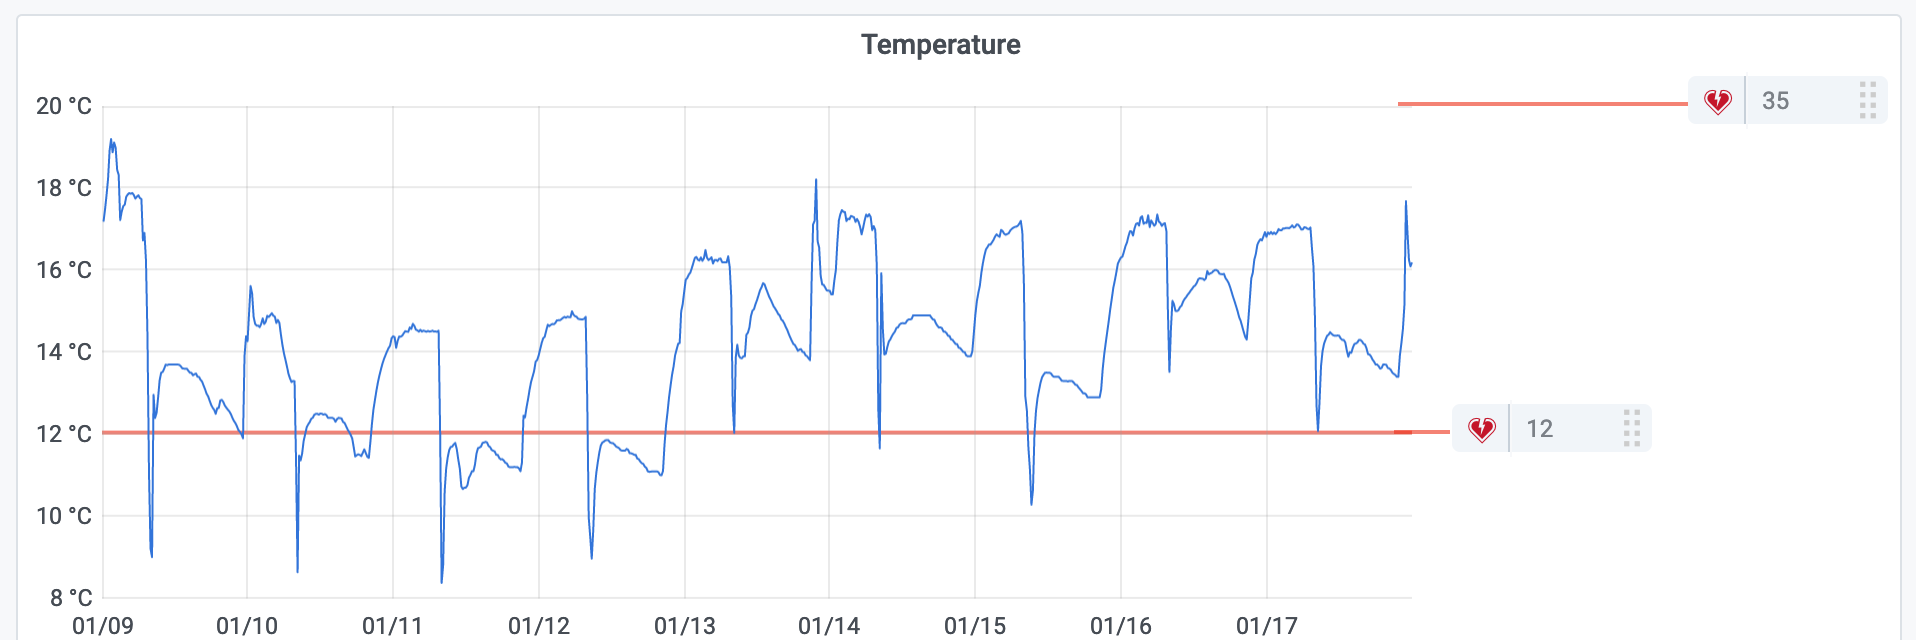
After your microcontroller sent data for a while, it is time to visualize it. With InfluxDB Cloud you get data discovery and dashboard features directly on the Web UI included. Here is an example of my ESP8266 chip collecting some temperature readings for a week:
If you use a self-hosted InfluxDB instance you can either use Chronograf or generic dashboarding solution like Grafana. For installing Grafana using docker check out my previous blog post.
If any of this is outdated or does not work for you please leave a comment or reach out via Twitter. Appreciate the feedback 👋